
A few things I realised were -
*Cut down your images to fit the print bed when exposing the screen. This helps you to keep registration correct. (When I say 'registration' I mean one layer fitting perfectly over the next layer.)
*Also cut down the paper you are printing on to fit the print bed, this also helps with registration.Without this I find it is pretty much impossible to get registration correct.
*Use a light box to make sure both images fit well on top of each other. I use a thick perspex sheet balanced on top of an ikea lamp because I don't have a proper light box!
* I sometimes use photoshop to figure out my layers. I first scan in my drawing, then on photoshop I make a new layer and basically colour in the drawing. Then I hide the original image and print out just the coloured in layer. I then sit this printout onto my lightbox with a blank sheet on top and, using the gocco carbon pen, I trace onto the blank sheet. This will be the image I expose first.

This is the carbon drawing for the first exposure, I will print it in three colours. I used the foam blocking tape in between colours on the screen, this stops the colours from running into each other, although it still happens slightly. I think it is part of the charm of print goccos.

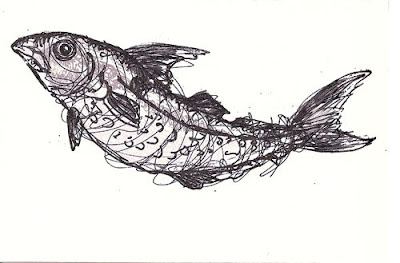
So, this is the result of the first exposure. Now I want to make the outlines and a bit of detail. This I take from my original drawing traced in carbon pen.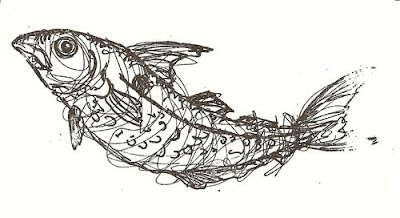 This is the result printed on a blank piece of card just to show the image. For some reason the end of the tail didn't expose onto the screen very well. This is possibly due to only one of the lamps flashing, make sure both lamps are screwed in completely. This may be the reason, but it may not be. It's still a bit of a mystery to me. If anyone has any other possible reasons for this happening I'd love to hear! To correct this I have bought a dark grey ink and I will draw in the tail with my dip ink pen on each print.
 This is the result printed on a blank piece of card just to show the image. For some reason the end of the tail didn't expose onto the screen very well. This is possibly due to only one of the lamps flashing, make sure both lamps are screwed in completely. This may be the reason, but it may not be. It's still a bit of a mystery to me. If anyone has any other possible reasons for this happening I'd love to hear! To correct this I have bought a dark grey ink and I will draw in the tail with my dip ink pen on each print.
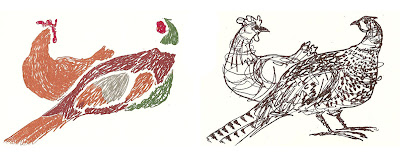
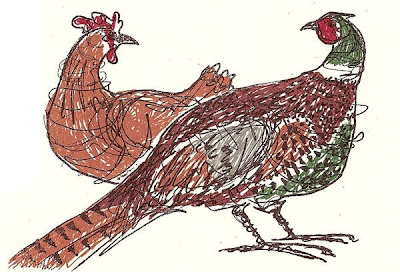
This is the final result. It is a haddock, an illustration for one of my mum's recipes for her cookbook. Below is another sequence for an illustration of a pheasant and a chicken.


6 comments:
Oh I love the chicken one...they're awesome and so unique for a cookbook. Super! will it come out in Oz?
hi hollabee. thankyou!
my mum's cookbook is only really going to be on sale through her cafe/ restaurant, although i've been pushing her to put it on etsy! it wont be out until next christmas, so we all have a bit of a wait.
Thanks for these hints, they're really useful! Up to now my registration has been trial and error... artistic licence I call it!!
I love your drawings.
It is so funny how the gocco, which never interested me until recently, has suddenly become something indispensible. More so now that I have read this!
nice tutorial! i am working on a multi-screen design right now that I can't wait to start on.
Post a Comment